How to Water Newly Installed Plants and Trees in Tampa
New Plants Need a Different Watering Plan
Newly installed plants and trees depend on the moisture inside their original root ball. Their roots have not spread far enough into the surrounding soil to reach water on their own. A lawn irrigation cycle often wets the mulch and top layer of soil while leaving the center of the root ball dry. The opposite problem also occurs. Daily watering without checking the soil keeps the root zone saturated, pushes out oxygen, and leads to root decline.
The goal is to apply water slowly to the root ball, wet the surrounding soil, and allow the area to drain before the next watering. The schedule below is a practical starting point for South Tampa. Adjust it for rainfall, temperature, plant size, soil drainage, sun exposure, and the species installed.
Water Immediately After Installation
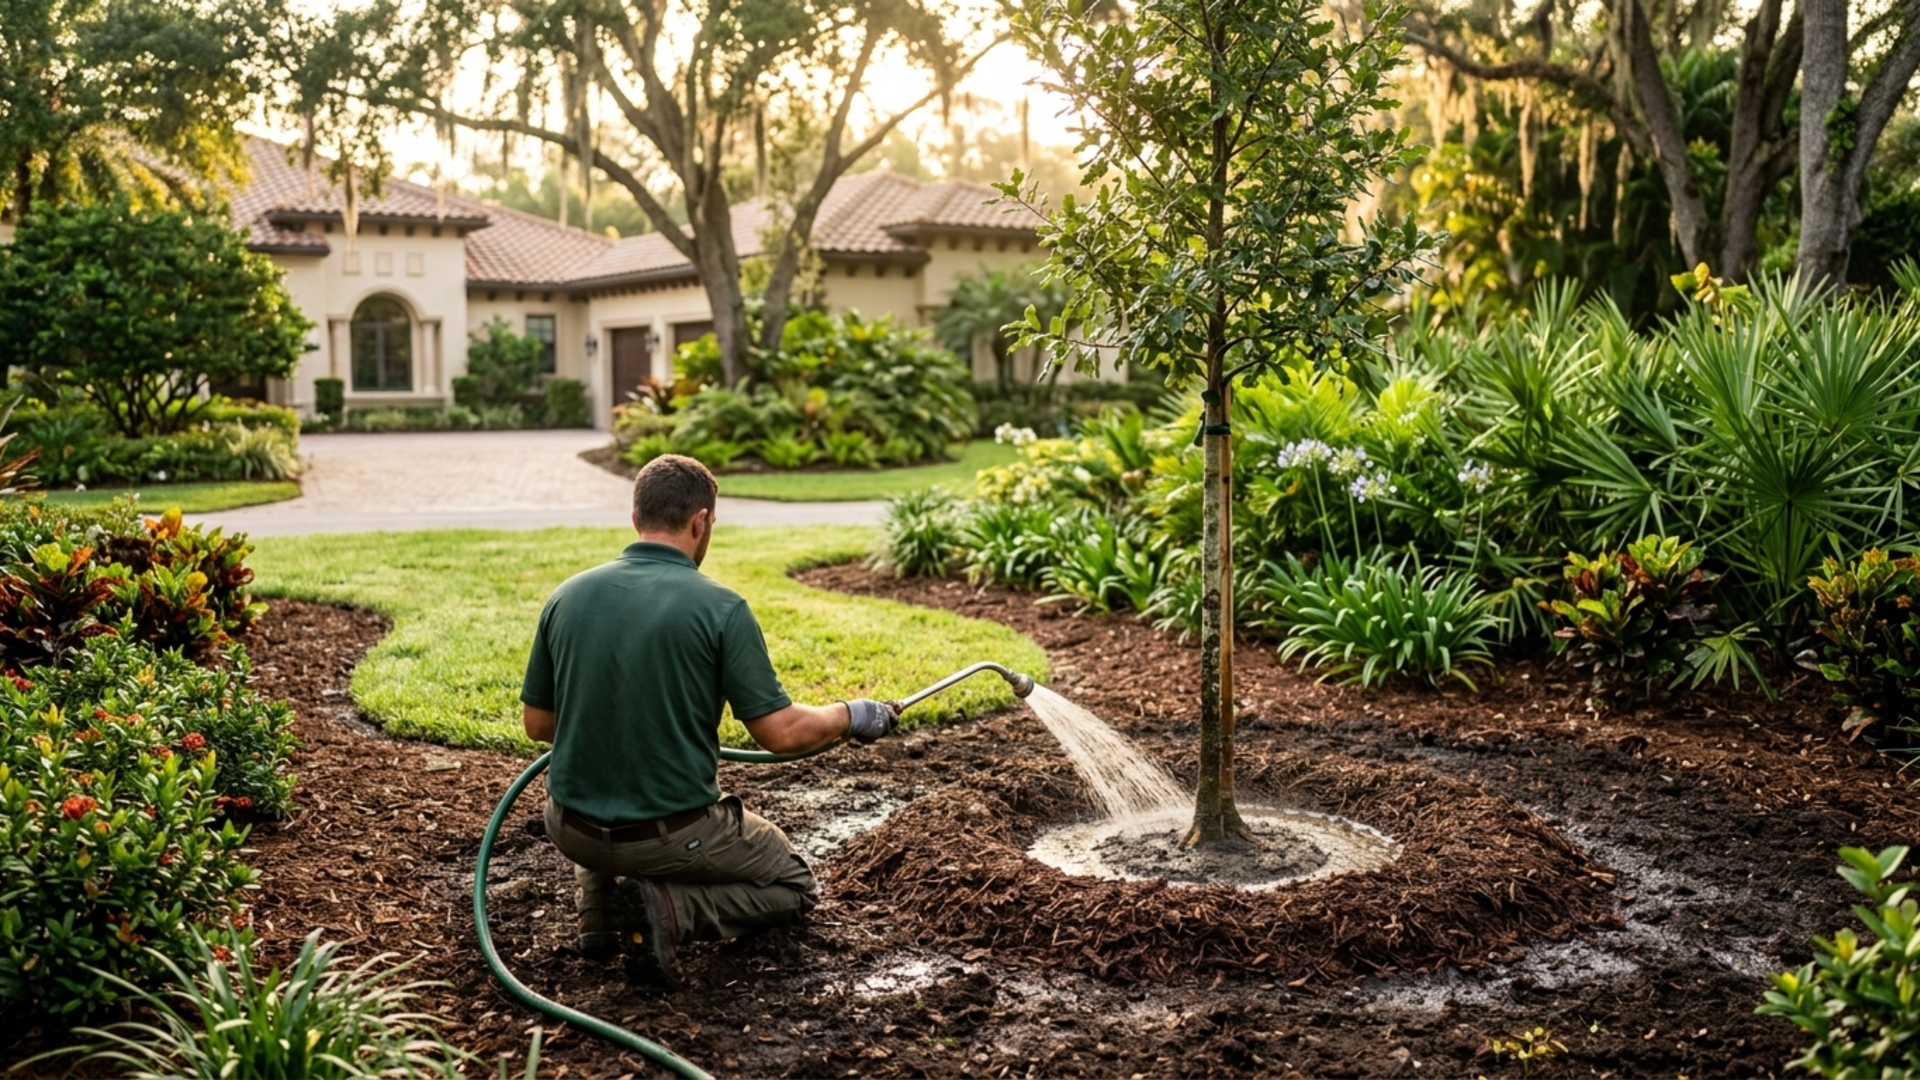
Every new plant and tree should receive a slow, thorough soaking on installation day. Direct the water over the root ball and the soil immediately around it. Do not spray only the leaves. The first watering settles loose soil, removes large air pockets, and makes sure the root ball begins the establishment period evenly moist.
For a tree, build a temporary watering ring near the outside edge of the root ball. Keep the trunk flare exposed. For shrubs and smaller plants, move mulch aside enough to see where the nursery root ball meets the surrounding soil. Return the mulch afterward, but keep it several inches away from stems and trunks.
Schedule for Small Plants and 1-to-3-Gallon Shrubs
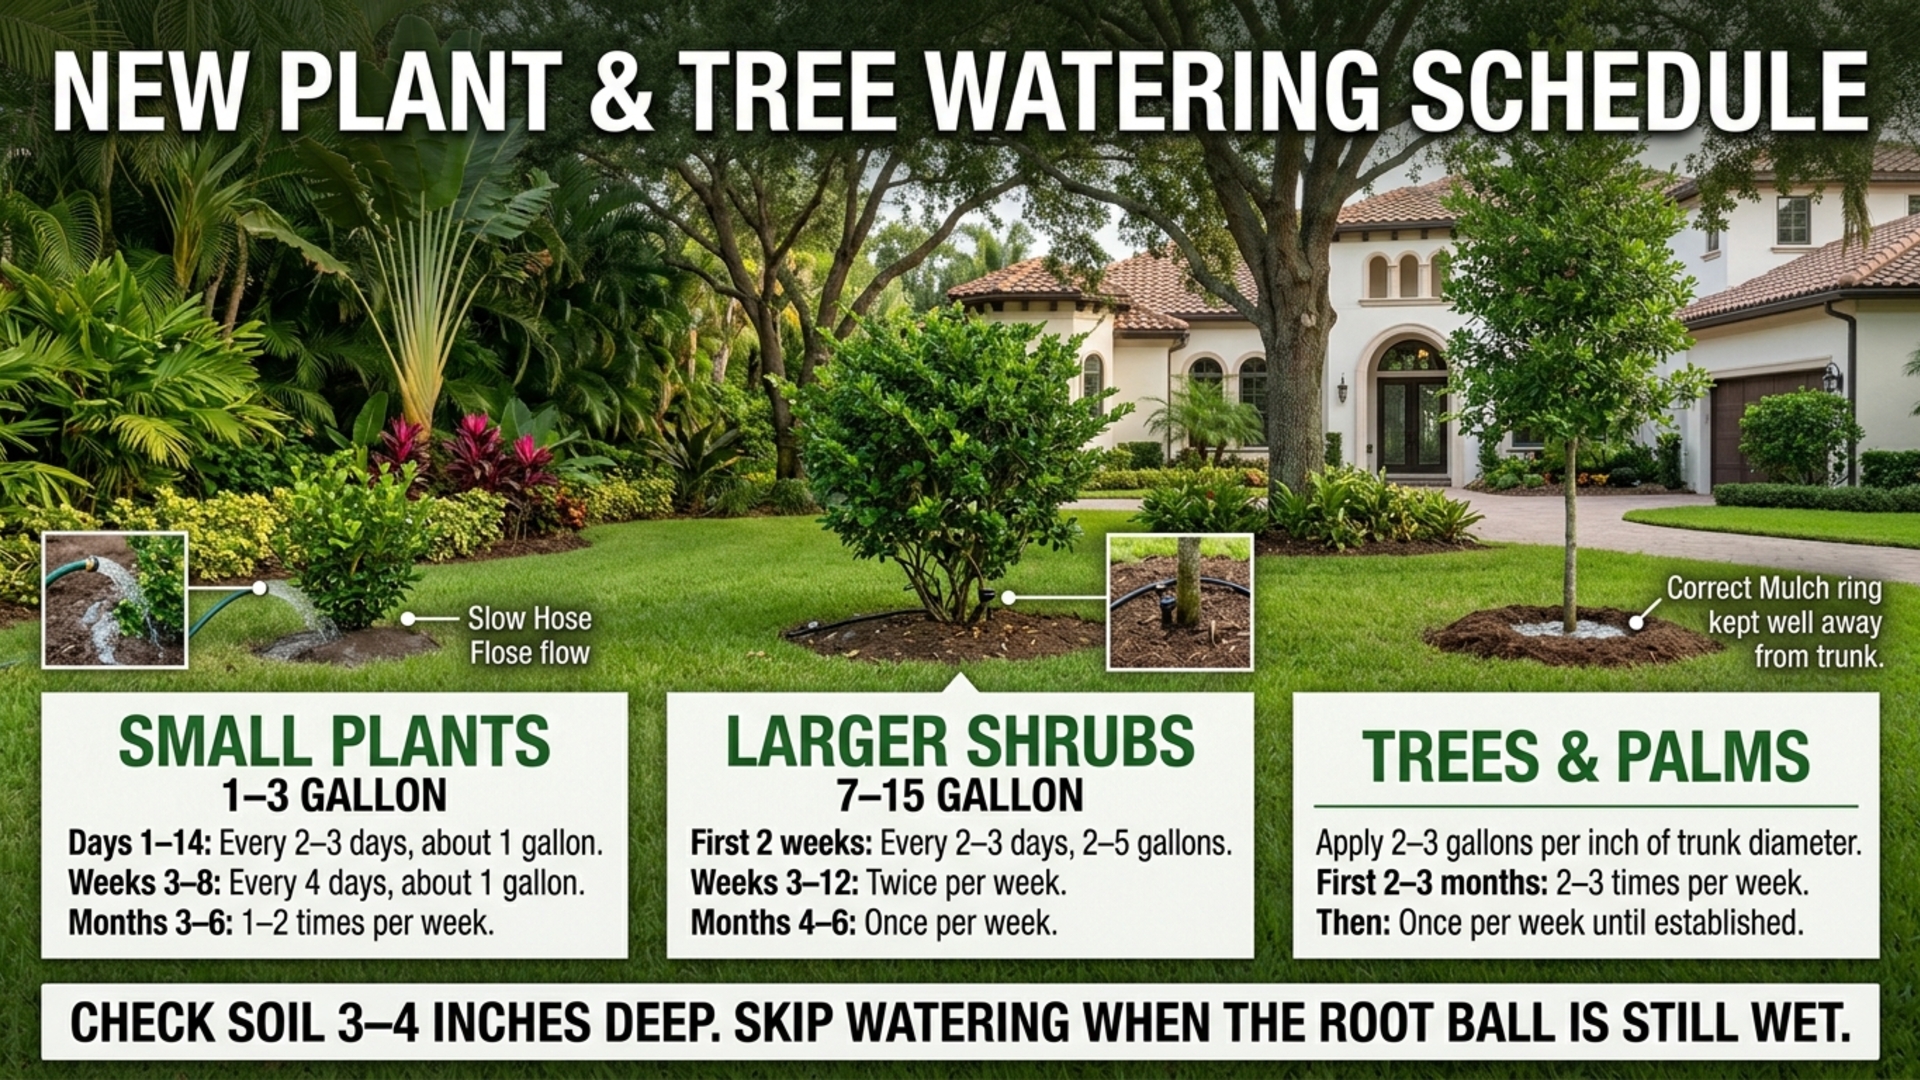
Installation day: Apply about 1 gallon directly to each root ball.
Days 2 through 14: Check the root ball every day. Water every two to three days when the upper inch begins to dry. During extreme heat, drying wind, or full afternoon sun, some small plants need water more often. Apply about 1 gallon per plant at each watering.
Weeks 3 through 8: Water about every four days when rain does not wet the root zone. UF/IFAS research for areas south of Orlando supports about 1 gallon every four days for a typical 3-gallon shrub during establishment.
Months 3 through 6: Water once or twice per week according to soil moisture and rainfall. Reduce frequency gradually. Do not stop suddenly while the plant is still producing new roots.
After establishment: Water during extended dry periods or when the plant shows early moisture stress. A properly matched plant should need much less supplemental water after its roots spread into the surrounding soil.
Schedule for Larger Shrubs and 7-to-15-Gallon Plants
Installation day: Apply 2 to 5 gallons slowly across the root ball, depending on its size.
First two weeks: Check moisture daily and water every two to three days if the root ball is beginning to dry. Apply enough water to moisten the full root ball without creating standing water.
Weeks 3 through 12: Water twice per week when rainfall is limited.
Months 4 through 6: Water about once per week during dry weather. Continue longer for large plants, slow-rooting species, or plants exposed to reflected heat.
Schedule for Newly Installed Trees and Palms
Measure a tree's trunk diameter about six inches above the soil. Apply 2 to 3 gallons of water for every inch of trunk diameter at each watering. A tree with a 2-inch trunk needs about 4 to 6 gallons per session. A tree with a 4-inch trunk needs about 8 to 12 gallons.
First two to three months: Water two to three times per week. Use the higher frequency during hot, dry conditions and the lower frequency when the root zone stays moist.
After the first few months: Water once per week during dry periods until the tree is established. Larger trees require a longer establishment period because their roots must spread farther beyond the original root ball.
Apply water slowly over the root ball and just beyond its edge. Keep irrigation off the trunk and out of palm crowns. Do not leave a hose running unattended against the trunk. Palms also need consistent root-zone moisture after installation, but saturated soil increases the risk of root problems.
How Long Should the Water Run?
Minutes alone do not tell you how much water reached the plant. Hose pressure, nozzle size, drip-emitter flow, and irrigation design all change the amount delivered. Measure the output once, then use time confidently.
Open hose test: Place the hose in a 5-gallon bucket and time how long it takes to fill. If it fills in one minute, the hose delivers about 5 gallons per minute. At that rate, 1 gallon takes about 12 seconds, 5 gallons takes one minute, and 10 gallons takes two minutes. Turn the flow down so the water soaks into the soil instead of running away.
Drip emitter timing: A 1-gallon-per-hour emitter delivers 1 gallon in 60 minutes. A 2-gallon-per-hour emitter delivers 1 gallon in 30 minutes. Two 2-gallon-per-hour emitters running for 60 minutes deliver about 4 gallons total.
Tree bubbler timing: Check the bubbler's rated flow or catch its output in a bucket. A bubbler delivering 1 gallon per minute needs about 6 minutes to apply 6 gallons. A slower bubbler delivering one-half gallon per minute needs about 12 minutes.
Slow application works best. If water begins moving across the surface, stop for 10 to 20 minutes and resume. This cycle-and-soak method gives compacted or fine soil time to absorb the water.
How to Check the Root Ball
Do not judge moisture by looking at the mulch. Push a finger, soil probe, or narrow hand trowel 3 to 4 inches into the edge of the root ball. Water when the soil feels slightly dry at that depth. Wait when it feels cool, wet, or muddy. Check more than one location when the plant is large.
A brief Tampa shower might wet the leaves and mulch without soaking the root ball. A steady rain that wets the soil several inches deep counts as a watering. A rain gauge helps. Soil moisture matters more than the number shown by a weather app.
Signs the Plant Needs More Water
Early signs include drooping during the morning, curled leaf edges, dull foliage, premature leaf drop, and a root ball that pulls away from the surrounding soil. Some plants wilt during the hottest part of the afternoon and recover by evening. Check the soil before adding water. Heat stress and dry roots are not always the same problem.
Signs the Plant Is Getting Too Much Water
Watch for persistently wet soil, yellowing leaves, soft new growth, leaf drop, algae, mushrooms, sour-smelling soil, and water standing around the root ball long after irrigation stops. These symptoms often resemble drought because damaged roots no longer move water efficiently. Adding more water makes the decline worse.
Important Watering Rules
- Water early in the morning whenever possible.
- Target the root ball and nearby soil, not the foliage.
- Use low-volume drip, a bubbler, a watering wand, or a slow hose flow.
- Keep mulch 2 to 3 inches deep and away from stems and trunks.
- Reduce watering after meaningful rainfall.
- Increase monitoring during hot, windy weather and near pavement or walls.
- Check each irrigation zone after installation. A head aimed over the plant does not prove the root ball is receiving enough water.
- Do not rely on the lawn schedule for new trees and large shrubs.
The Best Schedule Responds to the Soil
A written schedule gives you a strong starting point. The soil gives you the final answer. New plants need consistent moisture, but their roots also need oxygen. Check the root ball, measure the water you apply, and reduce frequency as roots move outward. This approach protects the installation and helps plants develop a wider, stronger root system for Tampa's dry spells and summer heat.
Call a specialist at Ecoscape if a new plant is wilting, yellowing, dropping leaves, or staying wet for several days. We can check planting depth, irrigation coverage, drainage, and root-zone moisture before the problem becomes permanent.